
Cosplay on the Cheap: Crafting an Epic Wonder Woman Tiara


Welcome to All That’s Cosplay’s ‘Cosplay on the Cheap’ DIY feature, where we will show you how to craft epic cosplay props, accessories, and costumes at a price that will make your wallets happy. First off, we will be showing you how to create an item from the popularly cosplayed Amazonian superheroine from the DC Universe, Wonder Woman. If you are looking to cosplay Wonder Woman, here is how to make her tiara on the cheap!
What you’ll need:
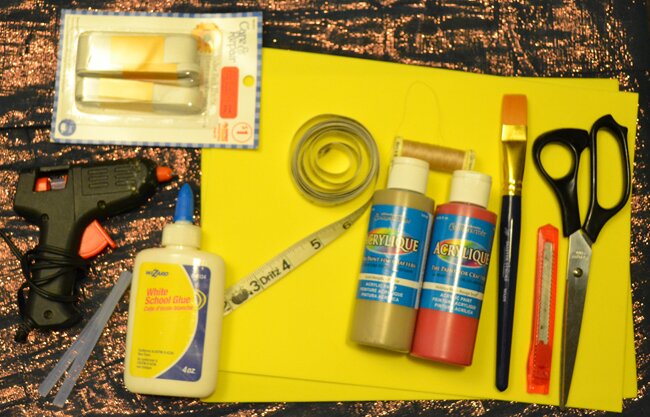
- craft foam
- measuring tape
- pen or pencil
- scissors or a craft knife
- craft glue and a container
- paint brush
- acrylic paints
- glue gun and hot glue
- elastic
- needle and thread or a sewing machine
Everything that you need for this tutorial can be found at your local dollar store. If you can’t find a glue gun at the dollar store, you can probably find one for an affordable price at Michael’s or Hobby Lobby (and don’t forget to check their websites for coupons!). You can also purchase many of these items in bulk, which will help you build a craft arsenal and make things cheaper in the long run.
Step 1: Research
The first step in any cosplay is to do a ton of research. I usually start out by doing an internet search for the character I want to be. In this case it’s Wonder Woman, and there are many different versions of her costume. I decided to go with a classic Wonder Woman look, with a straight bottomed tiara, but this tutorial will work for any of the designs.
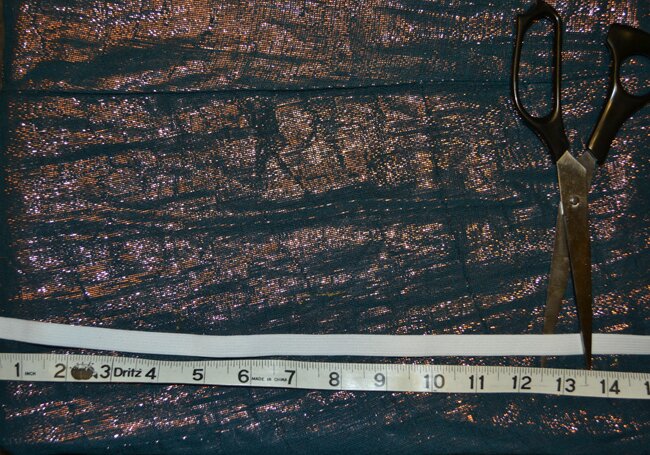
Step 2: Measure Twice

Your next step will be to measure from just in front of your left ear, across your forehead, to the front of your right ear. I used a wig head as an example, but you should use your own head for a better fit. Once you have your measurement, measure again just to be sure. If it’s the same both times, write it down, as this will be the length of your tiara.
Step 3: Start Drafting your Pattern
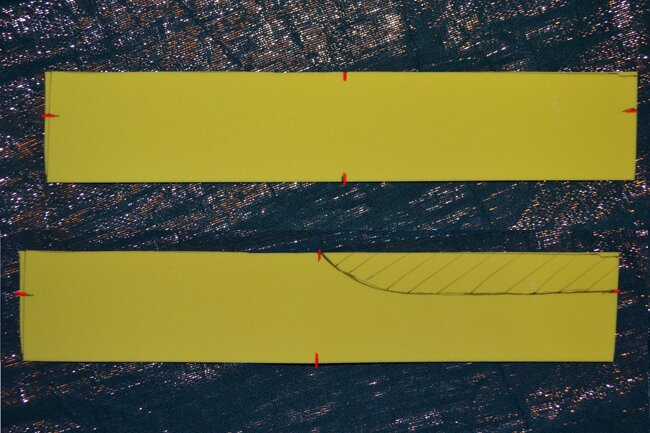
The measurement you took in step two will be the length of your tiara, so start by measuring that out into your sheet of craft foam. The height of the tiara will be two inches. Cut out that rectangle, and then measure half of the length and make a mark with your pen. Make another mark on the end of the craft foam, 3/4″ from the top. Next you will take your pen, and draw a curved line connecting the two marks you made, just like in the photo.
Step 4: Cut Once
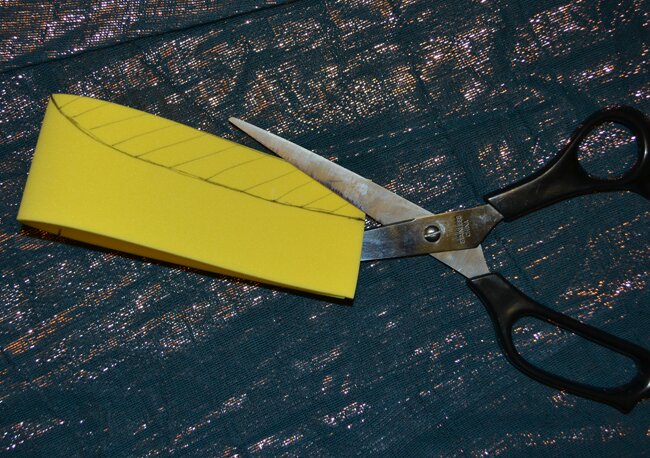
Now you just need to fold your craft foam in half and cut on the dotted line. Did I say cut once? Just kidding, you’ll want to cut out two identical pieces!
Step 5: Putting the Pieces Together

Using your hot glue gun, glue your two pieces together, one on top of the other. If you don’t have a hot glue gun, you can glue them together using craft glue, but you will need to wait longer for them to dry, before moving on to the next step.
Step 6: Sealing your Foam
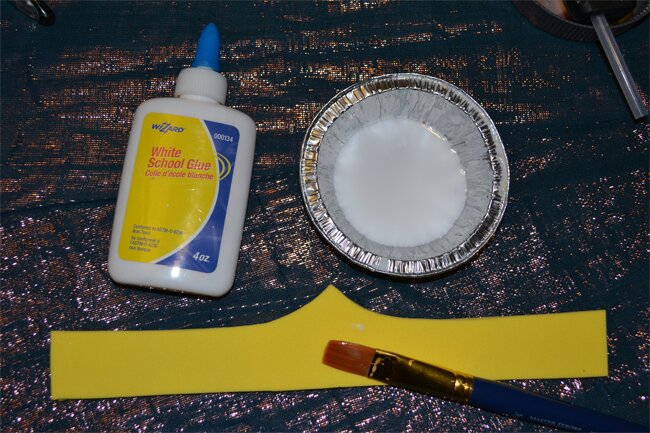
Once the base of your tiara is put together, you will need to seal the craft foam. This is the longest step of the tutorial, but a very important step when making craft foam armour or accessories, because it will keep your paint from soaking into the foam and looking blotchy. First you are going to get a small container and fill it with one part craft glue, and one part water. Using a paint brush, paint the glue onto your tiara base, making sure to fully coat the front and sides. This watered down glue is going to act as a sealer, and soak into all of the little holes in the craft foam. You will need to do at least two coats of glue, letting it dry fully between each coat. You will know when the tiara is completely sealed because it will look like a glossy, plastic surface, with no holes or bubbles.
Step 7: Detailing and Painting
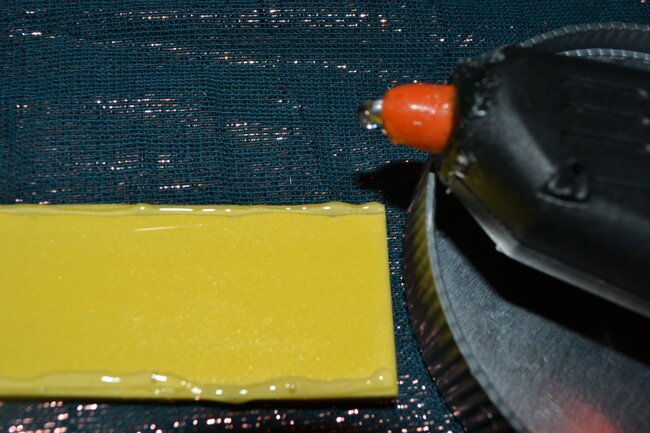
After sealing, depending on the Wonder Woman design you chose, you may want to add a bit more detail. For my tiara, I used hot glue to add a raised border before painting. The details you add are totally up to you, so don’t be afraid to make it original!
Now that your tiara is sealed, and your details have been added, you’re all ready to paint. I picked up some gold acrylic paint at the dollar store, but if it’s in your budget, you may choose to use spray paint for a more even coat. If you do decide to go with spray paint, please make sure that you do so in a well ventilated area. If you’re using acrylic craft paint, try to paint in one direction as to avoid paint brush streaks. Metallic paints tend to be less pigmented than your basic paint colours, so be sure to let your paint dry between coats for a nice, even finish.
Step 8: Time to get Star Spangled
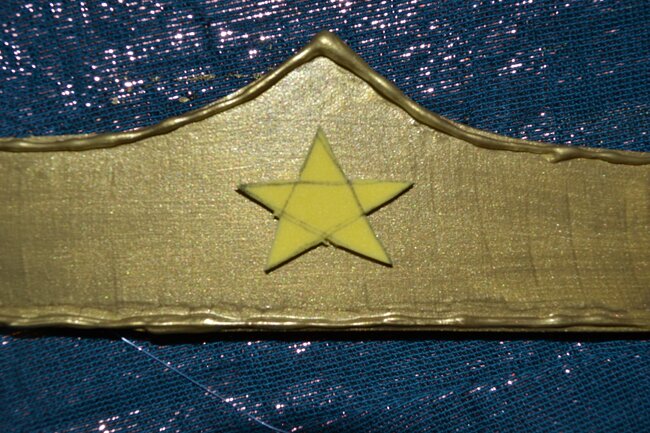
For your final detail, you have a couple of options: a gem, or a craft foam star. Some dollar stores will have a selection of small jewels, so if they are available, a red gem will surely take your tiara to the next level. If you can’t find a gem, you can make a nice looking star out of craft foam. Simply draw a star onto your foam and cut it out to size. You will want to give the star the same sealing treatment as your tiara base before painting. Give your craft foam star a few coats of bright red paint, letting it dry between each coat, and then glue the star down using hot glue.
Step 9: Measuring and Securing the Elastic Band
The last step of making your own Wonder Woman tiara is to measure and secure the elastic band that will hold the tiara on your head. You will do this by measuring from the front of your left ear, around the back of your head, to the front of your right ear, while keeping the elastic a little bit taunt. Cut the elastic at that point, and then head over to your sewing machine and sew the ends of your elastic to either side of the tiara. You can use a sewing machine on craft foam, so this will save you a bit of time, but if you don’t have a sewing machine, don’t worry! You will only need to do a bit of hand sewing here, and a good sharp needle should have no problem going through craft foam. Once you’re done sewing, try on your brand new Wonder Woman tiara. If it fits too loosely, you can sew a small loop in the elastic band, which will be hidden by your hair or wig. Remember, it’s easier to remove some elastic, than it will be to repair your tiara if you pull the elastic too tight and tear the craft foam.
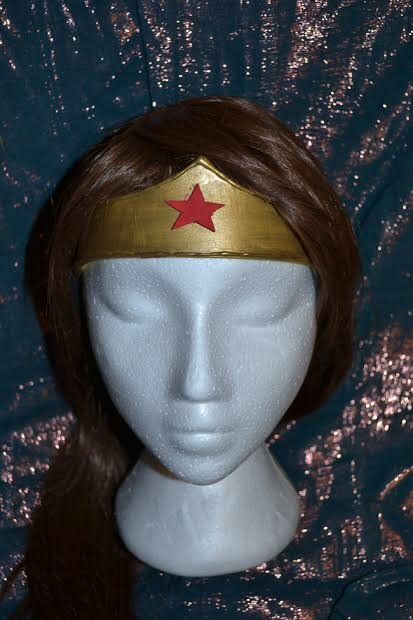
Your Wonder Woman tiara is now complete! There will be another tutorial coming up soon on All That’s Cosplay to teach you to create a set of Wonder Woman bracers, and put the entire look together. If you have any questions or comments about this tutorial, feel free to tweet me at @HacksawJenny!